
How to Create LED Text Layout in LEDEdit Software
In this tutorial, I'll discuss how to use the manual layout creator feature in the LEDEdit software to create an LED text layout for your program. I've discussed how to use LEDEdit's manual layout creator to create panel and irregular-shaped LED layouts. We have to design LED displays with text-shaped Pixel LEDs on occasion. In this tutorial, I'll show you how to discuss text-shaped layouts using LEDEdit's Manual Layout Creator. This tutorial is for the “LEDEdit” software, not the “LEDEdit-K” software. In the future, I will include tutorials for those software versions.
I'll show you how to discuss some text-shaped layouts. First and foremost, you must create a new project. Please see the section “Starting a New LEDEdit Project” in my previous tutorial for further information.
1- Click on “Project Config” in the top menu bar and select “Start Manual Layout“. This will bring up the manual layout design window.
2- Click on “Text Production” in the top main bar and select “Input Text” from the drop-down list. This will bring up the “Input Text” window.
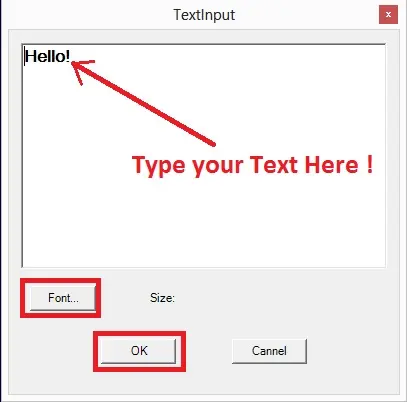
3- Enter the text you want to display as an LED layout in the text box. To view the font settings, click the “Font” button.
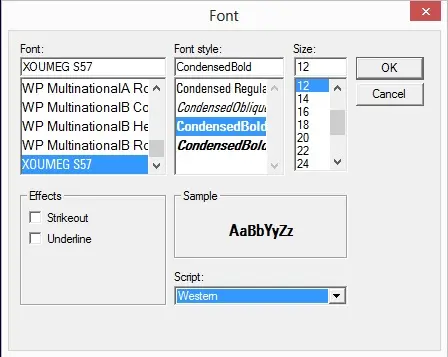
4- Click “OK” after selecting the font, font style, and font size from the menus. Your chosen font settings will be applied to the text in the text box. Now, in the “Input Text” box, click “OK“. To place the text layout you just created in any place on the worksheet, click on it.
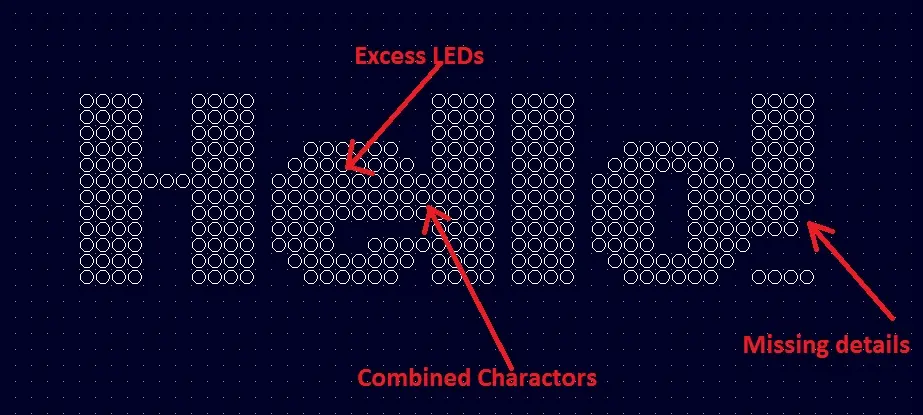
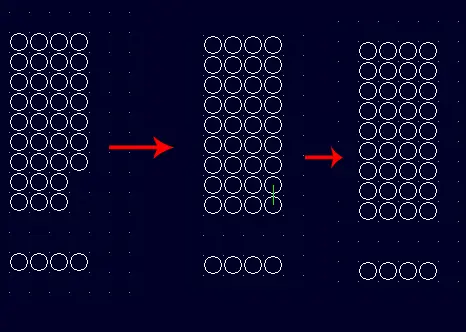
Your LED text layout will have some missing details, excess LEDs, and combined letters, as seen in the above image. We must correct this before connecting the LEDs. Excess LEDs must be removed, missing information added, and combined letters separated in the LED text layout. I'll show you how I fixed the above LED text layout.
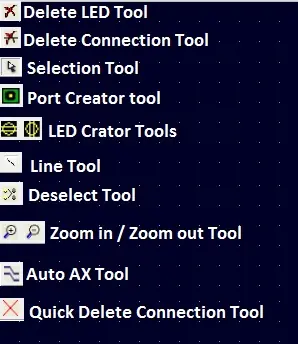
5- The first letter “H” is good; however, the second letter “e” has too many LEDs. Let's get rid of them. Select the excess LEDs one by one using the “Selection” tool icon, then delete the selection with the “Delete LED” tool. If you accidentally selected other LEDs, click the “Deselect” tool to deselect the selection, then re-select the LEDs you wish to delete and click the “Delete LED” tool.

6- The second and third letters have been combined. Unfortunately, the manual layout editor lacks a move tool. In the manual layout editor, this is how we move things. To begin, click the “Selection” tool and click and hold while dragging the mouse over the “H” and “e” letters to form the selection, then release it. You've now chosen “H” and “e“. Click the “Cut” tool, followed by the “Paste” tool. Move your mouse pointer to position the letters correctly. When it arrives at the desired place, right-click your mouse once to place it.


Doing the same to the last letter:

7- We have one more thing to do: fill in the blanks in the last letter. To achieve this, click any of the “LED Creator” tools and click on the places where LEDs are missing. This tool will create the connection between the LEDs you are creating, which we don't need, so ignore it while placing LEDs. However, after placing the LEDs, click on the “Quick Delete Connection” tool and then click and hold while dragging the mouse cursor to create a selection in the area where you placed the LEDs to delete the connections.
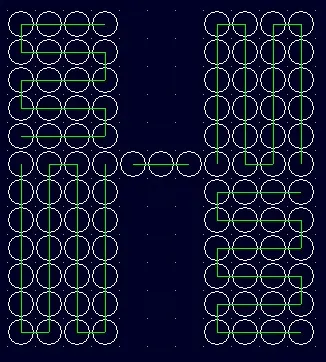
8- We need to build the connections now that we have finished adjusting our text layout. We could accomplish this manually using the “Line” tool, but it would be a waste of time. To connect everything, I'm going to use the “Auto LX” tool. To refer to how to use it, please see the “Auto LX Tool” section of my [Create LED Layout Using LEDEdit Software]. Here's my strategy with the “Auto LX” tool: I'm going to do it letter by letter and connect them all together.
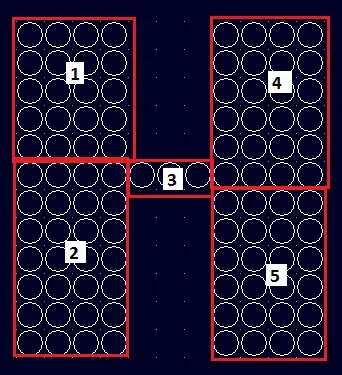
- Section 1: From the left
- Section 2: Yop right
- Section 3: Using the Line Tool to Connect
- Section 4 Top right)
- Section 5: Right into
Now, using the line tool, connect each section in series.
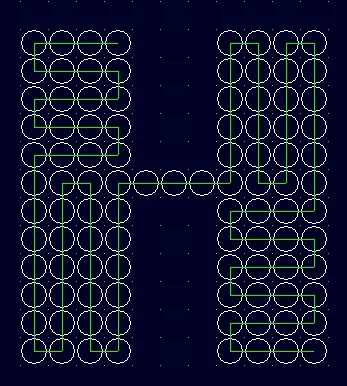
Because it's hard to use the “Auto Ax” tool for the letter “e“, I'm going to manually connect LEDs together using the line tool.
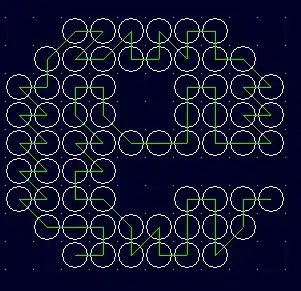
It should be noted that the letter e‘s indent is close to the letter “H“, and its end line is close to the letter “L“. letters are also wired to require the fewest number of wires possible. These are the key guidelines that you must adhere to while connecting LEDs. The reason for this is that the pixel LEDs are close together and are often sold in strings or strips.
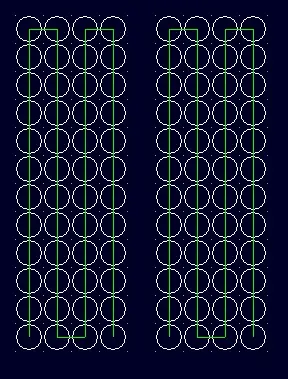
For the two “l” letters, I used the “Auto LX” tool, then selected “Top left” and selected whole “l” letters one by one.
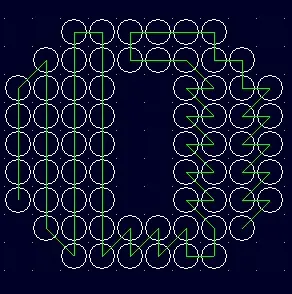
I used the manual method to create the letter “o” since using the “Auto Lx” tool makes it hard.
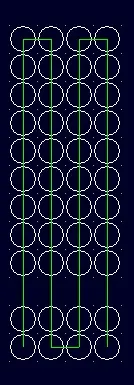
I used the “Auto Lx” tool in the “Top Right” connection method for the character “!“.
9- We must connect each letter in a series after we have finished connecting the LEDs in each letter.
To connect the ends of each letter with the subsequent letter, I used the connection or line tool. This is what happened:

10- To use this LED text layout, we must now connect it to the port. Using the “Port Creator” tool, create a port next to the “H” letter, then click where you want it to be placed on the page. By first clicking on the port and then the LED for the letter “H“, I connected the port to the LED Text layout using the line or connection tool. Please see the “Connecting to the Port” section of my [Create LED Layout Using LEDEdit Software] for additional information on the port.
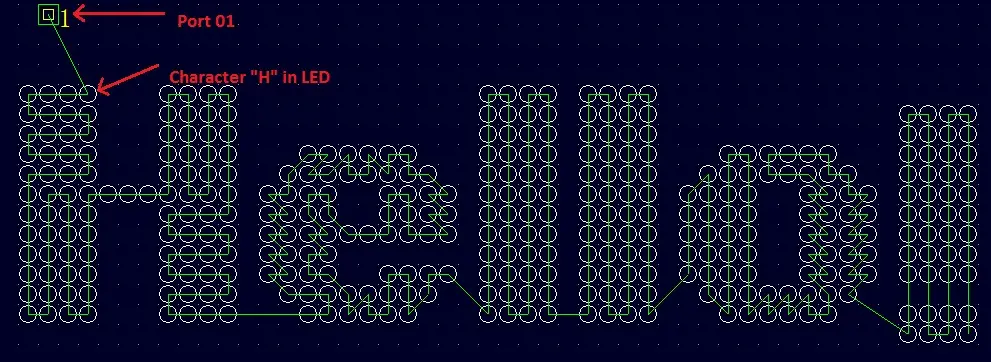
11- We have now finished designing our LED text layout. Choose “Save” by clicking “File“. Click “OK” after selecting a path and giving the file a name.
12- Close the “LEDEdit” main window after closing the “Manual Layout Creator” window. Choose “Import (.cxb)” under “Project Config” and click “OK” after selecting the newly generated file in the browse window. If you get an error message like “Import __ LED lights, Importing Failed 0 lights“, you have successfully created and imported your layout. However, if the number of failed lights is greater than 0, you have faulty connections. For further information, please see the “Fixing the Bad Connections” section of my [Create LED Layout Using LEDEdit Software].
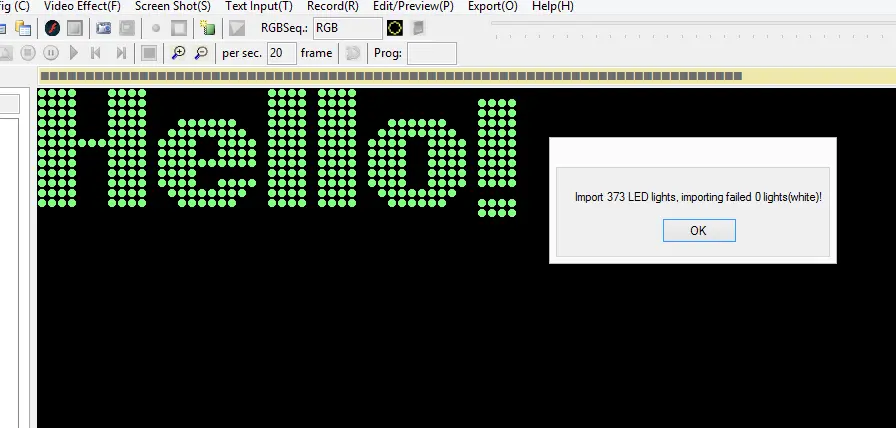
Continue from the subsection titled “Recording a Video or an Animation” in my previous tutorial [How to Use LEDEdit 2014 Software: Complete Tutorial] to apply a video or an animation to our layout.