
We’ve reached 156K followers! ✨🎉
Thanks to your amazing support and love, our page has grown to this milestone 🙌💙
To celebrate, we’re giving you $10 OFF 🎁💵
Coupon: 156kfollowers

Thanks to your amazing support and love, our page has grown to this milestone 🙌💙
To celebrate, we’re giving you $10 OFF 🎁💵
Coupon: 156kfollowers
In this tutorial, we will create an easy 2D patch with the help of the Matrix Generator for DMX output.
Task:
We have to create a patch for a 2D matrix of 4×4 pixel panels, which are controlled via DMX. The patch consists of 5 fixtures in a row and 4 fixtures per column. There should be an offset of 2 pixels between every fixture.
All pixels on this panel are RGB pixels, and there are no other control channels.
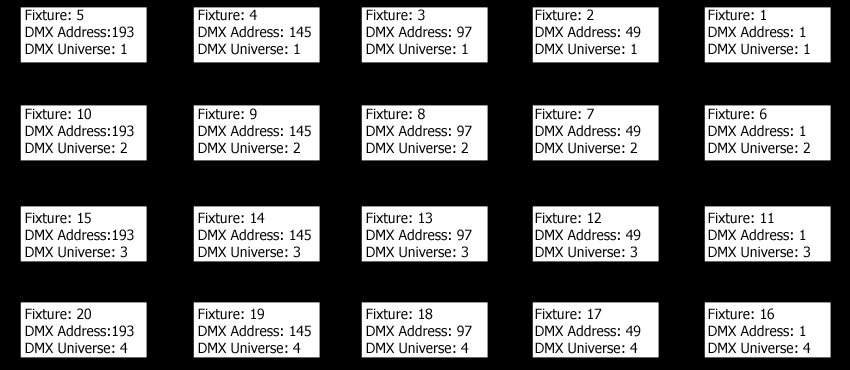
Every row should be assigned to a new DMX universe, starting with DMX start channel 1, and universe 1.
The following image shows the DMX address assignment:
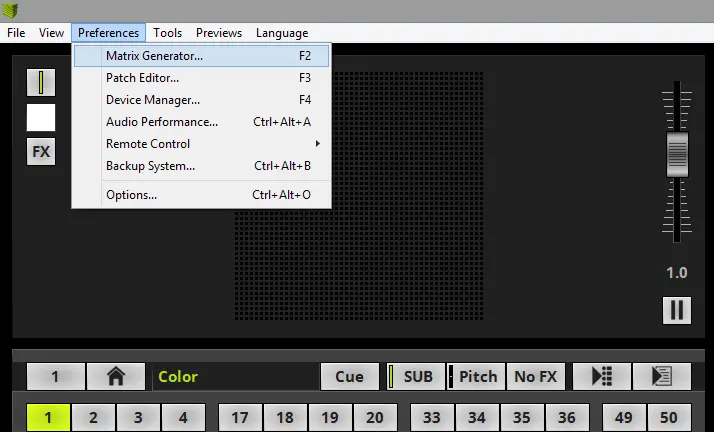
1- Please go to MADRIX to Preferences > Matrix Generator. [Keyboard shortcut: F2]
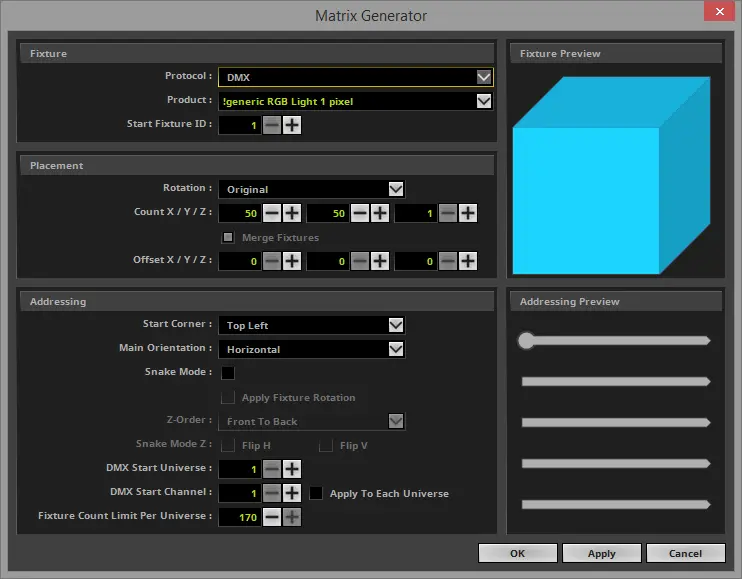
2- The Matrix Generator opens with the default settings.
The full explanation of all functions of the Matrix Generator is found in the MADRIX manual chapter: »Using the Software > Patching > Matrix Generator.

3- Now we have to change the settings according to our task to patch a 4×4 pixel panel with a resolution of 5 x 4 fixtures with an offset of 2 pixels between every fixture.
Now, we can compare the Addressing Preview with our patch plan. If both are equal, we click “OK“. [Keyboard shortcut: Enter]
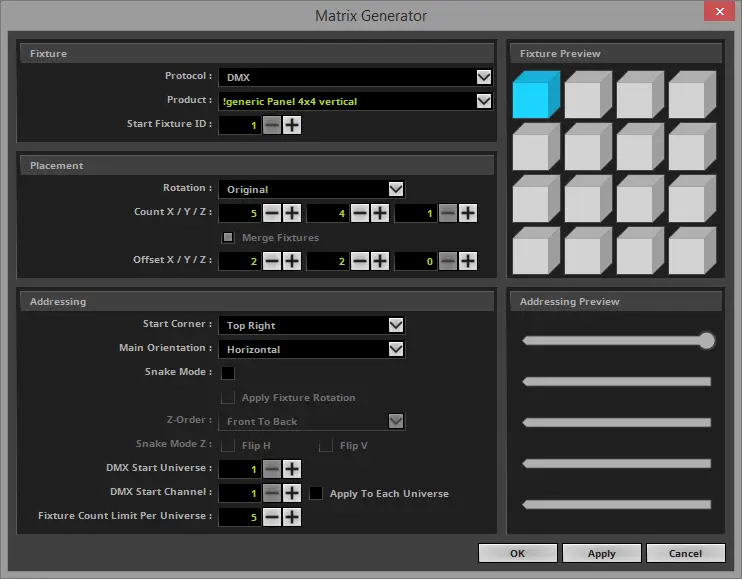
4- After the Matrix Generator was closed, MADRIX immediately created the new matrix of 5 x 4 “!generic panel 4×4 vertical” fixtures.
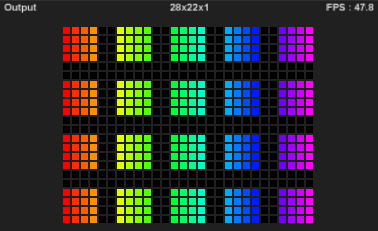
Congratulations! You have successfully learned how to create a 2D patch for DMX output.
Pixel LED Effects Download Pack: 7000 Effects for LEDEdit
https://lededittm.com/pixel-led-effects-download-pack-7000-effects-for-lededit